


We have 2 inch (fake) wooden blinds in all of our windows and I realized that we never ever closed the ones on our first level. Never. And they covered up the top 1/4 of the windows when they were raised because the blinds are thick. I had mentally taken them down a ton of times but one night after work I grabbed a chair and a screwdriver (to use to pry the little brackets open) and went to town. J thought I was crazy. I got the blinds down from the living room and the kitchen (that blind didn't even work so we couldn't lower it if we wanted to!) and then I had to have Jonathan's help to hold the one in the dining room since it's a double window. Blinds are heaver than you expect! (J made sure I left all of the brackets just in case we ever want to hang them back up but I can't see that happening.)
I absolutely love the no-blind look on the windows. Our windows are tall and now we can actually see out of the entire window which I absolutely love in my living room because my windows open to green trees and the blinds don't get in the way of the view now! My living room windows already had drapes but my kitchen window never had a curtain or valance on the window so once the blinds were down, I loved the look but it just felt like something was missing.
I looked up this post from Young House Love and saw how easily they made a fake roman shade. I really didn't want to do a traditional curtain rod/valance. I wanted something flat and I knew the exact colors I wanted in the fabric and I knew I wanted a floral. I kept my eye out for the the fabric that I could see in my head but had never seen in real life. (This is always my problem. I get a crazy idea and then can't find what I need!) One day I was shopping for Cayden's birthday decorations at Hobby Lobby and I decided to stop by the fabric department and have a look to see if they had anything new since the last time I was there. And they had the exact fabric and colors I had seen in my head! Perfect! I was so excited! I only needed 1/2 yard and I don't even think it ended up being $10. In that same shopping trip I also found the fabric for dining room curtains that I had been on the hunt for! I love Hob Lob!
After the kids were in bed I got to work on my new shade using these directions. I stopped to get a 1x2 piece of wood and white duck tape at the store. I already had stitch witchery in my sewing box.
We measured the window and left an inch overhand on either side of the window. I wanted to mount it above the window so that the shade didn't interfere with the view out the window. Jonathan took it outside to cut it and pre-drill 4 holes in it.


While he was cutting the wood, I measured the width of the fabric and cut it and hemmed the sides with the stitch witchery. (BTW, sorry for the awful night time pictures with bad lighting.)

When J was finished with the 1x2, I cut small pieces of fabric to wrap around the two ends and secured it with white duck tape. Since my fabric was thick I did have to go back and cut out some of the overlapping fabric so it would lay flat against the wall. I just wrapped it like a little package.

Then I taped the top of the fabric onto the board. Once we held it up to make sure I liked it I put the tape all the way across the board to make sure it was secure. The picture below is the part that goes against the wall.

I wasn't sure how long I wanted my shade so I taped it up and had J hold it up to the window and I moved that "hem" around until I liked the length.

Once I had the length, I ironed in a crease and then cut the extra fabric off and ironed in the hem tape. Then J just had to screw the board into the wall (under the fabric) using the 4 holes he pre-drilled into the wood. (Yes my hubby enjoys doing home reno with his shirt off.) (Or he was relaxing on the couch and I dragged him off of it to help me... that's more like it:))

After!

Let's look at what the kitchen looked like before. This was when we moved in. The whole house was yellow. (Excuse the moving mess on the counters.) I honestly have a gag reflex and chills when I look at this picture because it brings back memories of All.Of.The.Yellow in our house before we swiftly covered it. {shiver}

After we painted but the before the blinds broke in the upright position. Still messy moving-in counters.

And now this is what it looks like!

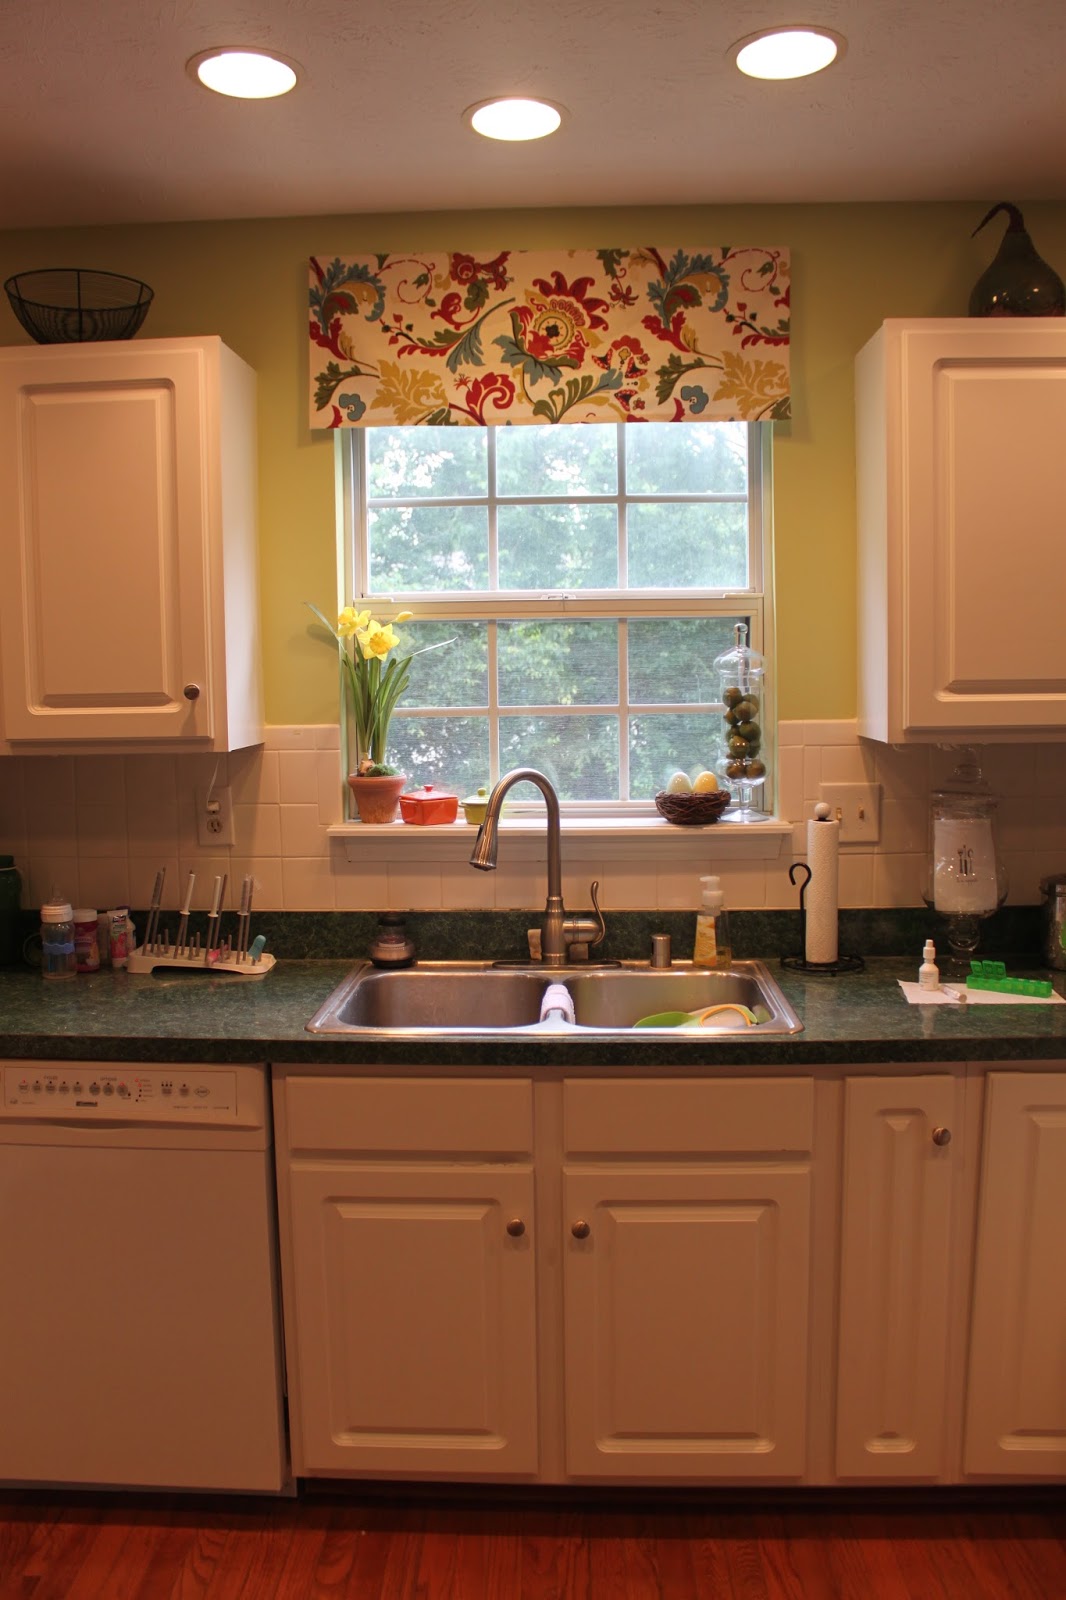
See my pretty view? This is why I didn't want the blinds covering the top 1/4 of the window.

Without lights. This is a truer picture of the colors of the fabric. I love the extra color it adds to the kitchen!

Yep. Still keeping it real with the bottle and sippy cup in the sink and travel coffee mug on the counter. This is life.

Linking up


6 comments:
Super cute! I love the open look and so undecided if I'm doing blinds on all the windows in the house this time!
Looks great!
Love this! I quasi-followed that tutorial too for fake roman shades in my kitchen. A little pop of color makes a big difference, right?!
I've been searching for a good curtain idea for a window in my kitchen (it's SUPER long!) and a window in our bedroom that is long and thin. I think this will be the perfect technique! Thanks for sharing!!
It's truly understandable why you wouldn't wish to hang some blinds on your window considering that fine view of greenery outside of it. But during those times when you would wish to limit the light coming in, or the heat is just too much, blinds, curtains, or shutters will come in handy. Well, glad you decided to put up some nice looking blinds to it. That sure gave your kitchen a more homey feel.
Roxie @ Allure Window Treatment
Great DIY solution for window decor! Sienna Shutters - Ireland
Post a Comment